
How To
How to Schedule an Email in Outlook: A Step-by-Step Guide
Microsoft Outlook is a powerful email client that offers a range of features to improve efficiency and communication. One of its most useful features is the ability to schedule emails to be sent at a later time. Whether you need to ensure timely communication across different time zones or simply want to draft an email in advance, knowing how to schedule an email in Outlook can be highly beneficial.
In this guide, we will walk you through the step-by-step process of how to schedule an email in Outlook, covering both desktop and web versions. Additionally, we will discuss troubleshooting tips, best practices, and ways to automate scheduled emails for maximum productivity.
Why Schedule an Email in Outlook?
There are several reasons why scheduling an email in Outlook can be useful:
- Time Zone Differences: Ensure your email reaches recipients at an appropriate time, regardless of their location.
- Work-Life Balance: Draft emails outside of working hours but send them during office hours.
- Avoid Forgetting Important Emails: Schedule emails in advance so that you never miss deadlines.
- Professionalism: Send emails at optimal times to maximize engagement and response rates.
How to Schedule an Email in Outlook (Desktop Version)
If you use the Microsoft Outlook desktop app, follow these steps to schedule an email:
Step 1: Open Outlook and Compose an Email
- Launch Microsoft Outlook on your computer.
- Click on New Email to open a new message window.
- Compose your email by adding the recipient, subject, and content.
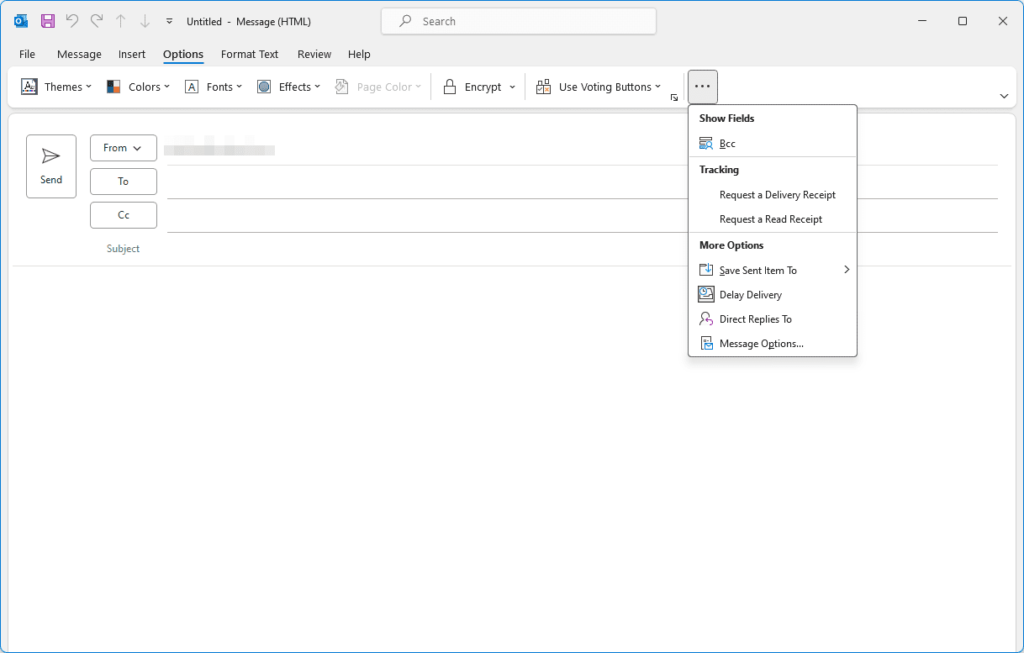
Step 2: Access the Delay Delivery Option
- In the message window, click on the Options tab in the ribbon.
- Select Delay Delivery from the list of options.
Step 3: Set the Delivery Time
- In the Properties window that appears, locate the Do not deliver before section.
- Select the date and time when you want the email to be sent.
- Click Close to save the settings.
Step 4: Send the Email
- Click Send in the email composition window.
- The email will remain in the Outbox until the scheduled time arrives.
How to Schedule an Email in Outlook (Web Version)
For those using Outlook Web App (OWA), the process of scheduling an email is slightly different.
Step 1: Log into Outlook Online
- Open your web browser and go to Outlook.com.
- Sign in to your Microsoft account.
Step 2: Compose an Email
- Click on New Message to open a new email window.
- Enter the recipient’s email address, subject, and compose your message.
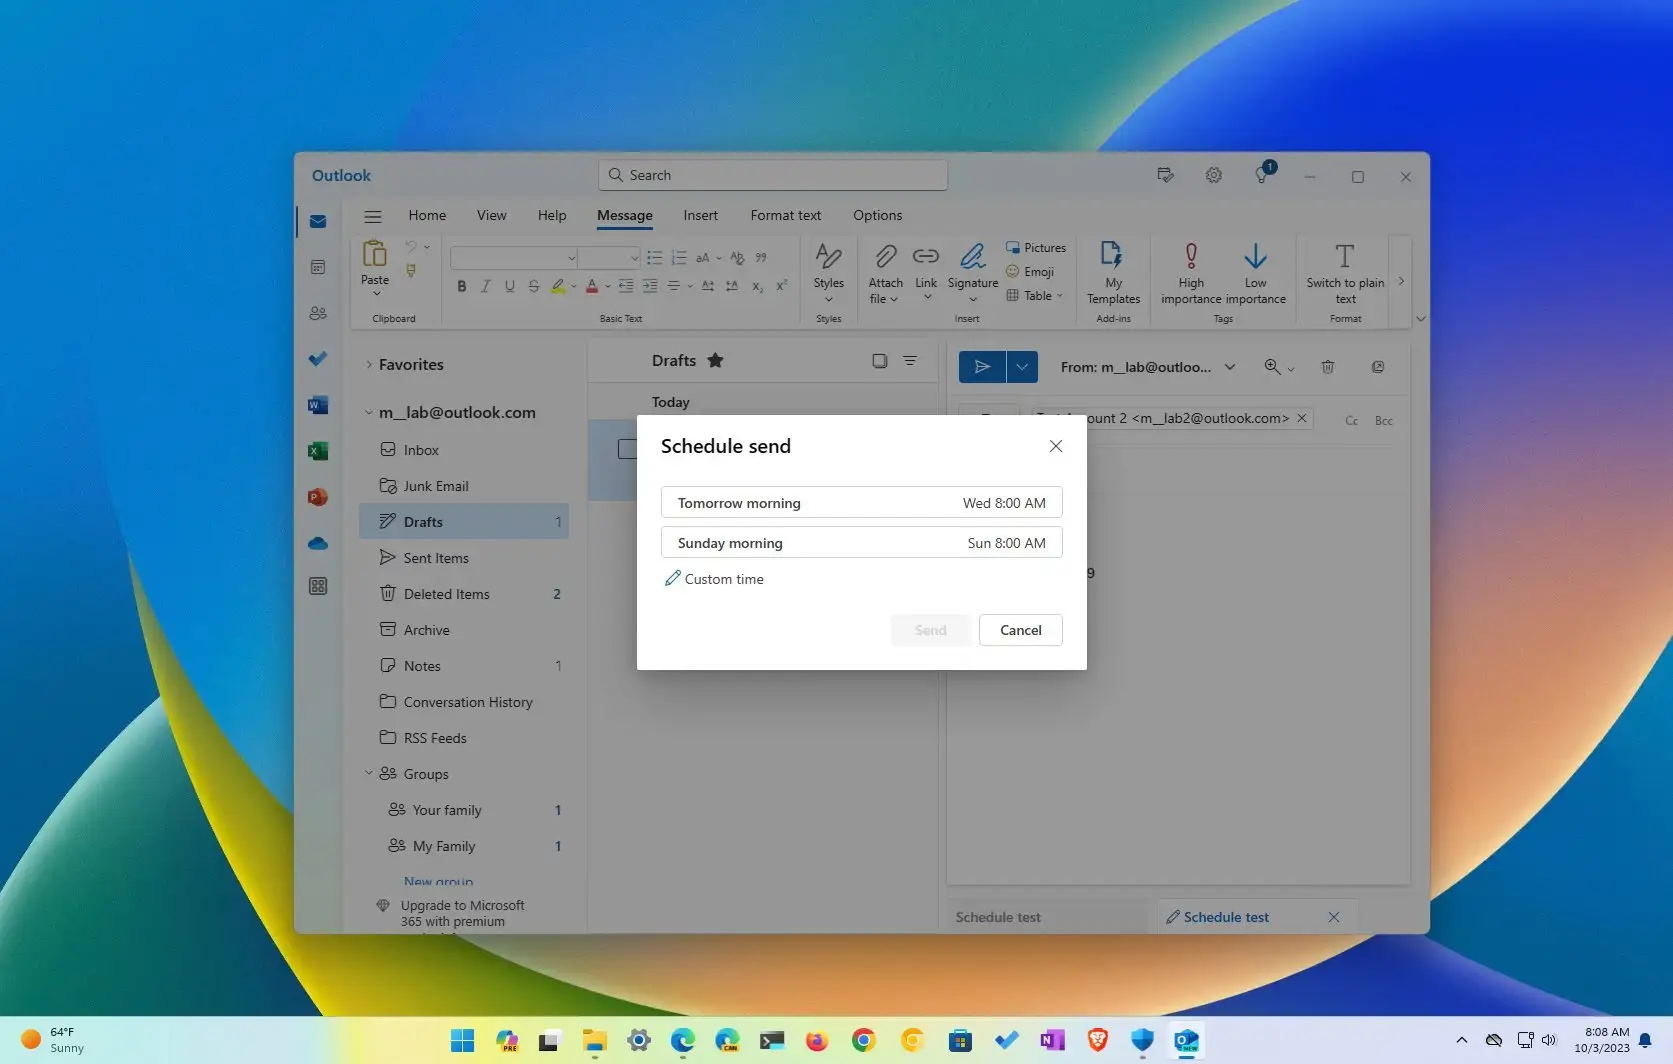
Step 3: Schedule the Email
- Click on the Send button dropdown (downward-facing arrow next to Send).
- Select Schedule send from the menu.
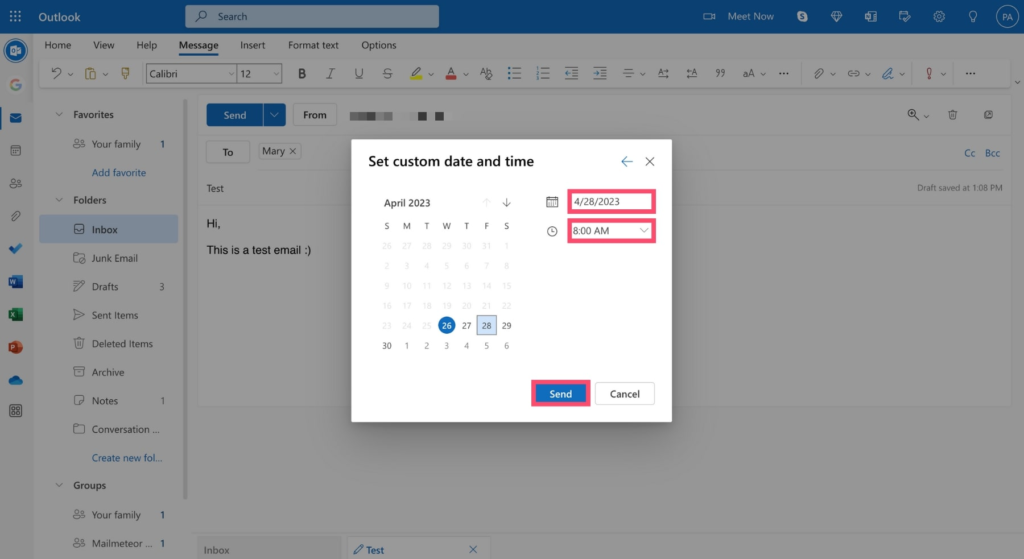
- Choose a predefined time or click Pick date & time to set a custom schedule.
- Click Send to confirm.
Managing and Editing Scheduled Emails
If you need to make changes to a scheduled email in Outlook, follow these steps:
Editing a Scheduled Email in Outlook Desktop
- Go to the Outbox folder.
- Double-click on the scheduled email to open it.
- Modify the email content or adjust the scheduled time by following the steps in Delay Delivery.
- Click Send again to reschedule.
Editing a Scheduled Email in Outlook Web App
- Navigate to Drafts if the email has not been sent yet.
- If already scheduled, cancel the scheduled send by going to the Sent Items folder and retrieving the message.
- Edit the email and reschedule it using the Schedule Send feature.
Best Practices for Scheduling Emails in Outlook
To make the most of Outlook’s scheduling feature, keep the following best practices in mind:
- Choose Optimal Sending Times: Research the best time to send emails for higher engagement.
- Verify Time Zones: Ensure that the recipient’s time zone is considered when scheduling an email.
- Double-Check Recipients: Before scheduling, confirm that the correct recipients are included.
- Use Follow-Ups: Set reminders to follow up if the scheduled email requires a response.
- Test Scheduling First: If you’re new to scheduling emails, test it with a personal email first.
Troubleshooting Issues with Scheduling Emails in Outlook
If you encounter issues when trying to schedule an email, consider these solutions:
1. Email Stuck in Outbox
- Ensure that Outlook is connected to the internet.
- Restart Outlook and check if the email is still in the Outbox.
- Check the Delay Delivery settings to confirm the correct date and time.
2. Outlook Web App Schedule Send Not Working
- Refresh your browser and try again.
- Ensure that your Outlook version supports the Schedule Send feature.
- Check if your email storage is full, as this may prevent sending.
3. Email Sent Immediately Instead of Scheduled Time
- Double-check that Delay Delivery is enabled before clicking send.
- Confirm that your system time is correctly set.
- Avoid making modifications after scheduling unless necessary.
Conclusion
Knowing how to schedule an email in Outlook is a valuable skill for professionals, students, and anyone who wants to optimize their email communications. By scheduling emails strategically, you can improve productivity, maintain professionalism, and ensure that important messages reach recipients at the right time.
Whether you’re using the Outlook desktop app or the Outlook Web App, the steps outlined in this guide will help you effortlessly schedule emails. Implement best practices, troubleshoot common issues, and take advantage of this powerful Outlook feature to streamline your workflow effectively.
Now that you know how to schedule an email in Outlook, start using this feature to enhance your email management and communication strategy today
you may also read

The KUKOO Creative Approach to Branding: From Vision to Visuals.

Marie Solimena Joins GIO Gelati to Bring a Taste of Italy to a Wider World

A Comprehensive Guide to Choosing the Right Customer Service Software

5 Habits That Will Help You Build Mental Strength

Sildenafil Tablets: The Go-To Treatment for Erectile Dysfunction

The Art of Fragrance Design: How Jarsking’s Team Elevates Perfume Packaging in 2025

The Popularity of Tungsten Wedding Rings for Men

Capsule Wardrobe for Toddler Boys

Why Workplace Aesthetics Are a Strategic Investment, Not a Luxury

Celebrate Tradition: Europe’s Most Enchanting Fairs and Festivals

How to Create a Successful Crowdfunding Campaign Video

Binary Options Broker Selection Made Easy

Elevate Your Summer Wardrobe with These Stylish Cardigan Looks

Castle App Free Download — Updated 2024 Version

10 Best Fake ID Websites 2025

Private Proxies for Secure and Anonymous Online Activities

How to Write a Check: A Step-by-Step Guide to Mastering This Essential Skill

Harry Bring: A Name Synonymous with Excellence and Innovation

Treatment in the best hospitals abroad

Phone Fashion: Trends and Styles in Custom Case Design
The KUKOO Creative Approach to Branding: From Vision to Visuals.
Marie Solimena Joins GIO Gelati to Bring a Taste of Italy to a Wider World
A Comprehensive Guide to Choosing the Right Customer Service Software
5 Habits That Will Help You Build Mental Strength
Sildenafil Tablets: The Go-To Treatment for Erectile Dysfunction
The Art of Fragrance Design: How Jarsking’s Team Elevates Perfume Packaging in 2025
The Popularity of Tungsten Wedding Rings for Men
Capsule Wardrobe for Toddler Boys
Why Workplace Aesthetics Are a Strategic Investment, Not a Luxury